How to Make Homemade Air Freshener for Diapers: The Ultimate Guide to Your DIY Natural Ways to Get Rid of Bad Diaper Pail Smell

Breaking into the world of DIY diaper pail fresheners ain’t as hard as cracking a code. Folks are ditching the store-bought stuff for homemade mixes that keep the nursery smelling like a garden instead of a barn. It’s all about using what you’ve got in the pantry or finding a few simple ingredients that don’t cost an arm and a leg.
Ever tried making a meal and thought, “Hey, why not make the air smell good, too?” That’s the spirit behind whipping up your very own air freshener for diapers. It’s easier than baking a cake, and you’ll end up with something that makes you breathe a little easier, knowing exactly what’s floating around your home.
Introduction to DIY Diaper Fresheners
Let’s face it, diapers are a stinky business, and not everybody’s nose is up for the challenge. But before you throw in the towel, consider this: homemade solutions that cut down on the pong and don’t take ages to make. With a few tricks up your sleeve, like a trusty disinfectant spray or a dab of baking soda, that diaper pail won’t know what hit it.
You don’t need to be a wizard to figure out these methods. They’re as simple as pie, smell a whole lot better, and they kick butt when it comes to getting rid of odors. Whether you’re mixing white vinegar and water or tossing a drier sheet into the mix, you’re on your way to a fresher, happier nursery.
Why Opt for Homemade Solutions?
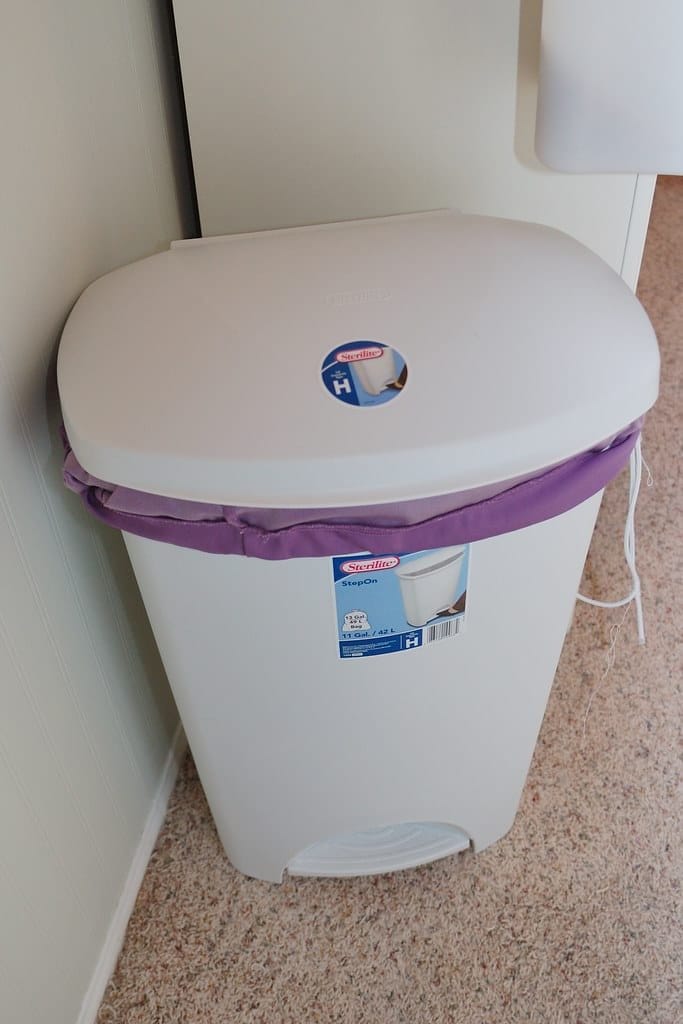
When it comes to tackling diaper odors, less is more. Limiting the number of diapers in the pail can save your nose from a world of hurt. Changing the bag when it’s got 8-12 diapers means there’s less time for things to get rank. Plus, tossing poopy diapers into a plastic grocery bag and shipping them off to the outside trash can work wonders. It’s like keeping the enemy at bay without needing fancy air fresheners.
Getting into the habit of regular changes is like setting up a defensive perimeter against stink invasions. And if you’re using disposable diapers, sending that poop straight to the toilet before bagging it up is like launching a preemptive strike. Mixing a bit of baking soda in there adds the cherry on top, keeping your nose and your senses happy.
Understanding the Basics of Diaper Pail Odors
Let’s get down to the nitty-gritty of why diaper pails can start to smell more like a science experiment gone wrong. It boils down to not letting those diapers overstay their welcome. Making a habit of changing the bag before it turns into a biohazard zone is step one in odor control. That, and making sure poopy diapers are evicted to the outdoor bin pronto, can make a huge difference.
But when you’ve tried the basics and the stench still lurks, upgrading to dog waste bags might just do the trick. These mighty bags are built for holding poops without making a fuss about it. Add in some baking soda for its superhero odor-neutralizing powers, and you’ve got yourself a one-two punch against those relentless diaper pail odors.
Step-by-Step Guide to Creating Your DIY Diaper Pail Deodorizer
Rolling up your sleeves and diving into the DIY diaper pail deodorizer world is a bold move, but somebody’s gotta do it. We’re talking a lineup of simple yet effective tricks that go beyond the call of duty. From spraying Lysol like it’s your day job to introducing baking soda as the new sheriff in town, these methods don’t mess around when it comes to kicking odors to the curb.
For those looking to step up their game, consider harnessing the power of sunlight to zap away bacteria, or let essential oils work their magic in a spray bottle concoction. The beauty of these strategies is not just in their odor-busting abilities but in the sheer satisfaction of knowing you’ve crafted your very own armor against diaper pail demons.
1. Baking Soda: A Natural Odor Absorber
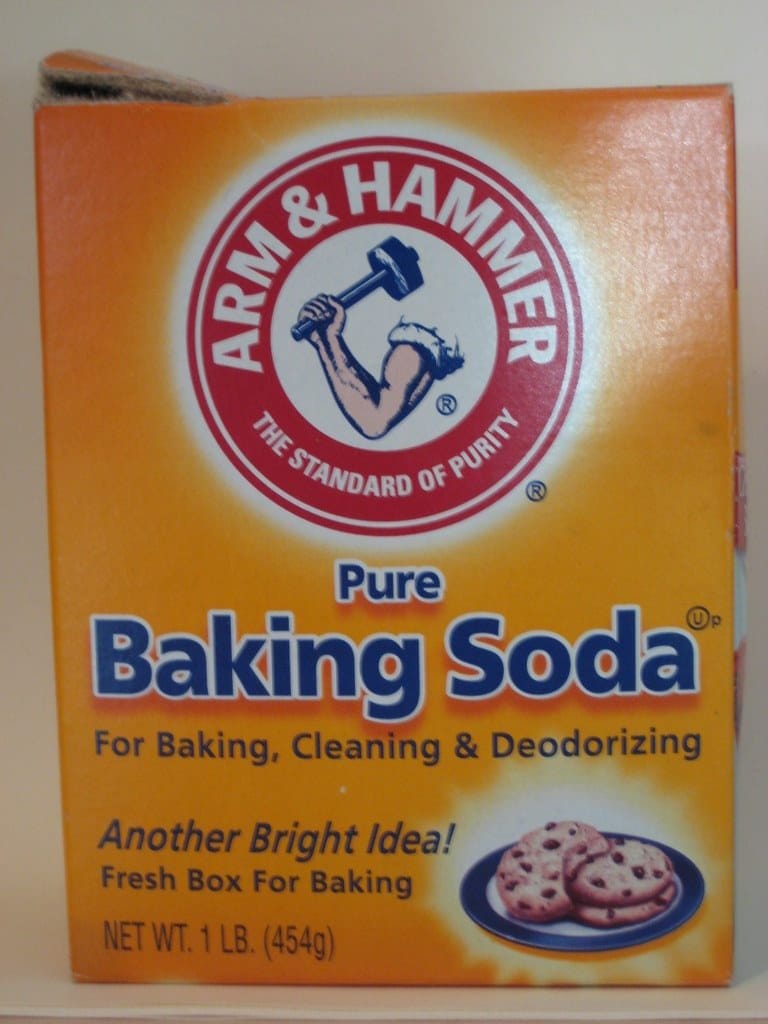
In the world of homemade wonders, baking soda is pretty much the MVP when it comes to neutralizing odors. This pantry staple isn’t just for baking cookies; it’s a powerhouse in absorbing those not-so-pleasant scents lurking around diaper pails. A sprinkle of this stuff goes a long way, ensuring your nursery smells more like clean sheets and less like, well, diapers.
Whether you’re layering the bottom of the trash can with baking soda or concocting a paste mixed with essential oils, this ingredient works its magic quietly and efficiently. With just 1 cup of baking soda, you’re laying down the foundation for a fresher-smelling space without breaking the bank or sacrificing much of your time.
How to Use Baking Soda in Your Diaper Pail
Getting started with baking soda is a breeze. Kick things off by introducing this odor-fighting champ to the bottom of your diaper pail or trash can. A generous two cups worth should set the stage. Next, every time you swap out the bag, give the new one a baking soda welcome mat by sprinkling a little inside. This acts as a double barrier against any unwelcome scents trying to stage a comeback.
For those looking to up the ante, blending baking soda with a few drops of your favorite essential oil creates a potent yet pleasant aromatic defender. This DIY paste can be placed at the bottom of the trash can in a breathable bag, continuously guarding against odors with every diaper tossed in. Rinse and repeat the process to maintain a consistently fresh atmosphere in your nursery.
2. Essential Oil Scented Spray: Customizable Fragrances
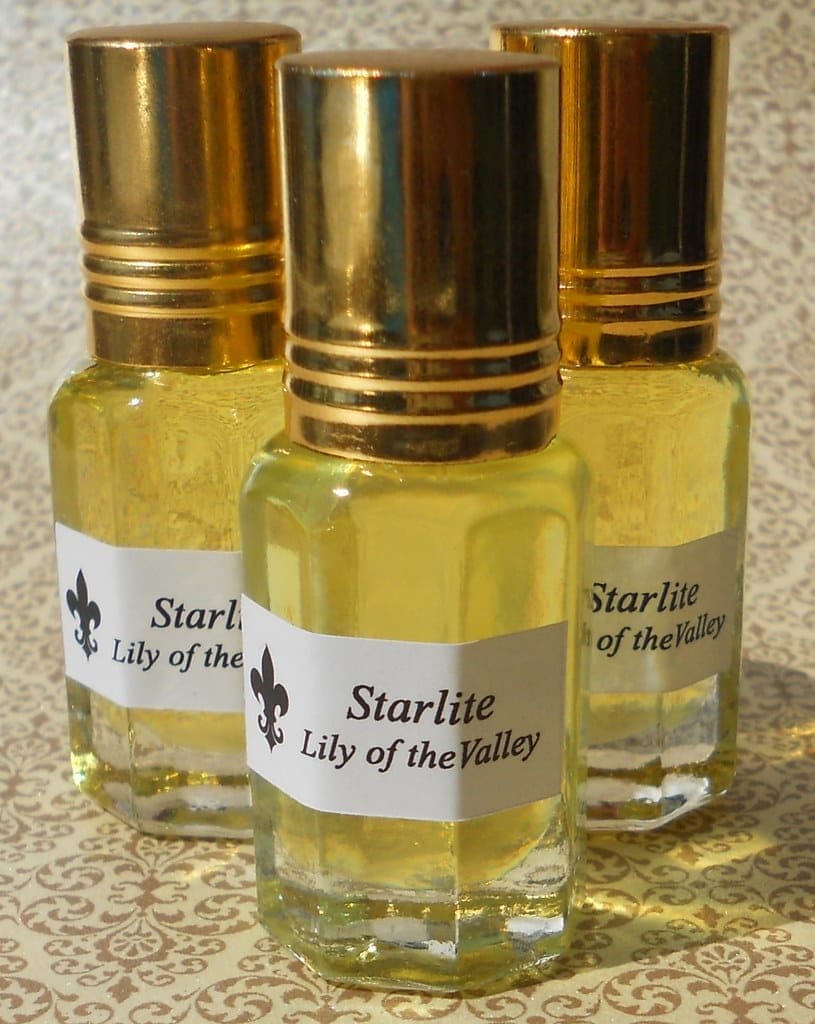
Creating an essential oil scented spray is like being the artist of your own aromatic palette. Mixing a bit of vodka, water, and your chosen essential oils in a spray bottle can turn diaper changing time into a surprisingly pleasant experience. With the flexibility to adjust the strength of the scent, your nursery can smell like a field of lavenders or a fresh ocean breeze, all while combating those pesky diaper odors.
Not only does this DIY spray work wonders in the nursery, but it also brings a breath of fresh air to your bathroom. Encouraging a spritz after use keeps the entire house feeling clean and smelling sweet. Plus, this method is a win-win for those venturing into homemade products, offering a simple, cost-effective solution to the age-old problem of diaper stench.
Crafting Your Scented Spray
Putting together a scented spray that’s both safe and sweet-smelling for the nursery sounds tough, but it’s easier than trying to sneak a nap with kids around. First off, grab a spray bottle, fill it halfway with distilled or boiled water to keep things clean, then add about 20 to 30 drops of your favorite essential oils. Think gentle scents like lavender or chamomile, which are like the baby whispers of the essential oil world. Give it a good shake, and it’s ready to battle diaper odors on the front lines.
But before spraying it around like it’s going out of style, remember less is more. A light mist on the diaper pail or even in the air can make a big difference, without overwhelming those tiny baby noses. Plus, always give it a sniff test first. If it makes the room smells like a garden in bloom rather than a diaper disaster, you’ve nailed it.
3. DIY Scented Air Fresheners: Long-Term Solutions
For those after something that’ll last longer than a baby’s attention span, DIY gel air fresheners are a game-changer. Mixing gelatin with water and your chosen scent can leave the room smelling fresh for days. Just pour your scent marvel into jars, let it set, and place it near the changing table for a stealth odor defense. It’s kind of like setting up little smell-good guardians around the nursery.
And the beauty of it is the customization. Want to kick up the creativity? Add some color to the mix, or maybe throw in a couple of baby-friendly herbs or flowers. Just remember, we’re going for soothing scents, not a reenactment of the botanical gardens. Keep it simple, and those stinky diapers won’t know what hit ’em.
Preparing Your Homemade Air Fresheners
Getting started on whipping up those homemade air fresheners doesn’t require a chemistry degree, thankfully. Grab some heat-resistant jars, because no one’s got time for cleaning up a melted mess. Dissolve some gelatin in hot water, stir in your essential oils for that sweet scent, and maybe a splash of food coloring for kicks. Pour it into your jars, and bingo, you’re basically a DIY guru now.
Let those jars sit until the gelatin sets, which is about as long as it takes to convince a toddler to wear pants. Once solid, those babies are ready to be strategically placed around the diaper zone. They’ll work their magic, making that part of the house smell less like a diaper genie’s evil lair and more like an oasis of freshness.
4. EnviroKlenz – Advanced Odor Neutralizing Technology

Then there’s the heavyweight champion in the fight against nose-pinching odors: EnviroKlenz. This isn’t your average air freshener. These folks have got something that doesn’t just mask the smell; it takes it out to the back and gives it a good talking to. Their products use some sort of science magic to grab onto bad smells and neutralize them, without adding any scent of their own. It’s like having a silent ninja in the nursery, taking out diaper odors before they become a problem.
Whether it’s the granules you sprinkle in the diaper pail or the odor eliminator for cleaning up after accidents, they’ve got your back. And that’s crucial because, let’s face it, accidents happen. But with EnviroKlenz on your team, at least they won’t smell like it.
How EnviroKlenz Tackles Stubborn Diaper Pail Smells
EnviroKlenz knows dealing with stinky diapers is like trying to wrangle a pack of squirrels. It’s tough. Their Odor Neutralizing Granules are like the secret weapon. Just sprinkle some directly into the diaper pail or trash can, and it’s game over for those smelly odors. The granules don’t just cover up the scent; they go to work eliminating it, leaving nothing behind but freshness. And when it’s time for cleanup, they make it a breeze, not a chore that has you holding your breath and racing for the finish line.
Plus, their Every Day Odor Eliminator is a lifesaver for cleaning those not-so-pleasant messes that come with potty training or the occasional oopsies. It works hard so you don’t have to, making sure that your home stays smelling like a home, not a daycare during flu season. For tackling those tough smells, EnviroKlenz is like having a superhero in your cleaning closet.
Advanced Deodorizing Techniques
Let’s face it, keeping your home smelling fresh is more than just hiding the evidence. It’s about getting to the root of the problem. Emptying the trash often, especially when it’s a battleground of disposable diapers, is key. And don’t even think about letting those diapers party in the pail for too long. Changing the bag regularly, like every couple of days, is like a preemptive strike against stink invasions. Trust me, your nose will thank you.
Beyond the basics, cracking a window to let in some fresh air might sound old-school, but it’s an ace move for airing out stale nursery odors. And when it comes to those carpets, a good vacuum session can do wonders. It’s all about keeping on top of things, so the only smells lingering are the ones you want sticking around.
Leveraging Activated Charcoal for Odor Control
When you’re up to your elbows in diapers, activated charcoal might just be your new best friend. This stuff is like a magnet for bad smells. Pop a few bags of bamboo charcoal around the diaper station, and watch as it goes to work absorbing those funk vibes. It’s like having an invisible force field that keeps the air smelling clean.
And when the going gets tough, don’t forget the simple power of tying up those trash bags tight. It’s a small move, but it locks the stench away like a vault. Changing the bag before it gets too cozy with stinky diapers is also key. Think of it as reducing the stench before it even gets a chance to settle in. Activated charcoal doesn’t just mask odors; it neutralizes them, making it your secret weapon in the never-ending diaper duel.
Utilizing Vinegar for its Natural Disinfecting Properties
Vinegar isn’t just for salad dressing, folks. This humble kitchen staple is a mighty warrior in the battle against odors and germs. A simple mixture of vinegar and water can work miracles on diaper pails, cutting through that not-so-lovely aroma without leaving behind a harsh chemical scent. Just give the pail a good spray and let Mother Nature’s disinfectant do its thing.
For an extra kick, why not get fancy and add a little vanilla extract or lemon juice to the mix? It’s like giving your nursery a spa day, minus the cucumber water. With vinegar, you’re not just covering up the smell; you’re wiping the slate clean. It’s affordable, effective, and always ready to hustle that stink right out of the nursery.
Making Deodorizing Disks for Extended Freshness

When it comes to dodging stink bombs from the diaper genie, regular fresh air just doesn’t cut it. That’s where deodorizing disks come into the game, playing defense in the smelliest of situations. These disks are like those tiny heroes in the tales, except instead of slaying dragons, they’re knocking out diaper pail odors. Crafting them is a cinch, and they pack a punch in the freshness department, ensuring baby’s diapers don’t turn the nursery into a no-go zone.
To whip these up, you need a few kitchen staples and a dash of patience. Mix baking soda and water, add a few drops of baby-friendly essential oil, and pour the concoction into muffin tins. Let them set and voila, you’ve got yourself an odor-fighting disk ready to tackle those pesky smells. These disks don’t just mask the odors; they absorb them, making the diaper genie’s job a whole lot easier and the nursery smelling like daisies.
Choosing the Right Ingredients
Now, picking the right scents for the home team is crucial. You wouldn’t want your kitchen smelling like a bouquet of roses any more than you’d want your bathroom reminding you of an orchard. It’s all about context. Think about what you dig scent-wise, but keep it appropriate. Seasonal scents can set the mood, but remember that not all fragrances are suited for every room. It’s like dressing for the weather; you gotta know what works where.
And when it comes to selecting those scents, consider the backdrop. Lavender might hit the right notes in a bedroom, but you might want something zestier for the living spaces. Balance is key, and with a bit of thought, your home can smell spot-on without confusing your senses. After all, scent is a potent memory trigger, and you want to ensure those memories are as pleasant as the fragrance you choose.
Safe Essential Oils for Baby’s Environment
In the realm of essential oils, not all are created equal, especially when it comes to baby’s nose and overall well-being. Some oils are like gentle giants, perfectly safe and soothing, while others might be too robust for the little one. Lavender and chamomile are like the soft lullabies of the essential oil world, known for their calming effects. A drop or two in your DIY concoctions can transform the nursery into a serene haven.
On the flip side, stronger scents, such as eucalyptus or peppermint, might be great for opening up your sinuses, but they can be overpowering for tiny humans. It’s all about finding those gentle, baby-safe fragrances that offer a whisper of scent without the shout. Steering clear of harsher oils ensures the air around your little bundle of joy is filled with nothing but comfort.
Identifying Non-Toxic Ingredients for DIY Projects
When you’re playing the at-home chemist, mixing up your next batch of odor busters, keeping it non-toxic is the name of the game. You don’t want to win the battle against diaper pail stench only to turn your nursery into a hazard zone. Ingredients like white vinegar and baking soda are like the dynamic duo of home cleaning. They’re tough on odors but gentle on the environment, including your baby’s sensitive surroundings.
Throwing a drier sheet into the mix might add a pleasant whiff to the air, but keeping it natural with ingredients you can pronounce (and probably find in your kitchen) adds an extra layer of safety. It’s like choosing a superhero team for your home; each member brings something unique to the table, working together to keep your castle clean and toxin-free.
Maintenance and Regular Care
Regular check-ups and clean sweeps aren’t just for the doc’s office; they’re also essential for your DIY diaper pail setup. Keeping things fresh is a bit like brushing your teeth: do it often, and you’re golden, but let it slide, and you’ll find yourself in a bit of a pickle. A routine sprinkle of baking soda, a splash of vinegar, and a quick swipe with a disinfectant keep the funk at bay and your diaper pail in tip-top shape.
Don’t forget, emptying that pail more often than you think you should is like hitting the refresh button. It keeps everything smelling good and less like you’re harboring a science experiment gone wrong. Keeping a tight ship ensures those homemade air fresheners aren’t working overtime, and your nursery remains a fresh, happy place.
Routine Cleaning Tips for Your DIY Diaper Pail
Alright, let’s get down to brass tacks—cleaning that DIY diaper pail shouldn’t be rocket science. First off, arm yourself with a concoction of white vinegar and water. This dynamic duo doesn’t just wing it; they bring their A-game to disinfecting and deodorizing without introducing harsh chemicals where baby sleeps. A regular spritz inside the pail after each bag change is like declaring war on odors.
Next up, don’t be stingy with the baking soda. This isn’t the time for a light sprinkle. Go for a generous dusting at the bottom of the pail every time you switch out the bag. It’s like having a bouncer at the door, keeping the stink from crashing the party. And remember, consistency is your ally. Regularly showing those pail odors the door ensures your nursery stays smelling like a nursery and not a diaper disposal site.
Refreshing Your Homemade Air Fresheners
So, you’ve gotten crafty and whipped up some DIY air fresheners, turning your home into an oasis of delightful scents. But even the best of the bunch needs a little TLC to keep kicking odors to the curb. Think of it like giving your car a tune-up; a little attention goes a long way. Refreshing those scented gems is simpler than you might think and keeps the freshness flowing.
Whether it’s a gel-based wonder or a baking soda powerhouse, periodically adding a few drops of essential oil can rejuvenate its scent-throwing capabilities. It’s akin to recharging its batteries, ensuring your homemade marvels continue to fight the good fight against odors, especially around the diaper pail. Remember, a well-maintained air freshener means a happier, fresher-smelling home for you and your little one.
Troubleshooting Common Issues
Even the most seasoned DIYers can hit a snag. Maybe your diaper pail smells are putting up a fierce fight, or your air fresheners just aren’t smelling as fragrant as they used to. Don’t throw in the towel; consider it a challenge. Often, it’s a matter of tweaking your approach. If odors persist, it might be time to double down on your deodorizing agents or try a new scent combination. Think of it as fine-tuning your strategy until you strike that perfect balance.
And if your homemade concoctions are a tad too potent, causing the nursery to smell more like a perfume factory, dial back on the essential oils. It’s all about finding that sweet spot where the air smells clean without overwhelming baby’s delicate senses. With a little trial and error, you’ll become the master of your scent domain, ensuring your DIY efforts not only neutralize odors but complement your home’s vibe perfectly.
Addressing Persistent Odors
When it comes to beating that stubborn stink in the nursery, sometimes folks gotta think outside the box. Limiting how many diapers call the pail home before taking a trip to the outside bin can put a lid on the stench. Changing the bag every couple of days, or when it hits that 8-12 diaper mark, don’t give those smells a chance to throw a party.
Then there’s the pro move: giving poopy diapers the VIP treatment by escorting them straight to the outdoor bin. Sealing them in a plastic grocery bag locks away the funk, and for the extra stubborn smells, dog waste bags come to the rescue. They’re tough and made for dealing with the stink on the front line, so you won’t be needing to freshen the air because the bad smells are already outta there.
Adjusting Fragrance Strengths for Sensitivity
Folks often find their senses can throw a fit with too much fragrance or the wrong kind. When whipping up a homemade air freshener, adding a personalized touch means you can dial down the intensity. Using distilled or boiled water as a base for essential oil-infused sprays can help keep things light and less likely to offend anyone’s nose.
Then there’s the smart trick of using epson salts as a carrier for the oils- releasing the scent gently into the air. This way, everyone’s noses are happy, and the nursery doesn’t become a no-go zone for those with sensitive sniffers.
Bringing It All Together: Enjoying a Fresher Nursery
The end game here is all about creating a space that’s as fresh as a bed of spring flowers. By taking the plunge into DIY deodorizers, parents craft a nursery that smells clean and inviting. It’s about shaking off the dread of diaper changes and knowing you’ve got the tools to keep the air smelling great.
With the right approach, you can transform diaper duty from a grimace-inducing task to an almost (dare we say it) enjoyable part of the day. The nursery becomes a place where pleasant fragrances gently mask the reality of what’s happening in those diapers, making memories a bit sweeter.
The Joy of a Custom, Fragrant Diaper Changing Area – Homemade air freshener for diapers
Welcome to the club where cuteness and stink battle it out daily. Luckily, creating a space that smells as good as it looks is totally within reach. With a sprinkle of creativity and some natural solutions, that oh-so-familiar diaper pail funk becomes a thing of the past. Imagine changing diapers surrounded by gentle scents that turn the task into something almost zen.
It’s all about the joy of making something that not only works but is personalized. A few drops of this, a sprinkle of that, and voila, your nursery’s smelling like a meadow at sunrise. It’s a little victory dance every time you realize that, yes, someone this cute can create something that stinky, but you’ve got it all under control.
Celebrating the Success of Your Homemade Solution
Finding the winning combo of ingredients that sends diaper odors packing is cause for a mini-celebration. Every time the nursery stays fresh for days on end, it’s like earning a parenting badge of honor. It’s about the satisfaction of mastering the art of the homemade air freshener and knowing those pesky smells don’t stand a chance.
Changing the game by keeping the diaper count low in the pail and tackling the worst offenders by giving them a direct pass to the outdoor trash speaks volumes of the craftiness involved. It’s these little successes, these moments of “I’ve got this,” that make the homemade route so worth it. Cheers to a fresher, happier nursery.
Your Journey to a Fresher Diaper Pail Begins Today
Embarking on the adventure of making a home smell welcoming, despite the presence of nappies, is not for the faint-hearted. Yet, with the right concoction of deodorizing disks and cotton balls soaked in essential oils, victory over vile scents is within reach. Imagine walking into a room, expecting the worst, only to be greeted by a gentle, pleasing aroma. This isn’t just a fantasy—it’s a reality that’s easy to achieve with a bit of elbow grease and creativity.
The transition from commercially available fresheners to DIY marvels doesn’t just promise a fresher-smelling nursery; it heralds the dawn of customized scents that protect and respect the delicate olfactory senses of both baby and parent. Sprinkling a bit of baking soda, setting a few deodorizing disks around, or strategically placing fragrance-infused cotton balls transforms a task that many dread into a ritual that brings a small, yet significant, sense of accomplishment and domestic harmony.
FAQ on homemade air fresheners against bad smell
Q: How can I deodorize a cloth diaper using homemade air freshener?
A: You can create a natural air freshener by mixing a few drops of essential oil with distilled water in a spray bottle. This can help to deodorize the cloth diaper and eliminate bad odors.
Q: What is a great DIY cleaning solution for a diaper pail?
A: A great idea for a diaper pail is to add baking soda at the bottom to absorb stinky odors. Additionally, you can mix witch hazel with essential oils to create a room spray that you can use every time you change the diaper.
Q: What essential oils can I use to make my homemade air freshener smell good?
A: You could try using essential oils like bergamot or lime for a fresh scent. Mix a few drops with distilled water in a spray bottle for an effective air freshener.
Q: How often should I use the homemade air freshener in my diaper pail?
A: You should use the air freshener in the diaper pail every time you change the diaper to keep the smell at bay and maintain a pleasant environment.
Q: Can I use the homemade air freshener as a room spray?
A: Yes, you can use the same mixture of distilled water and essential oils as a room spray to diffuse pleasant scents throughout the room, effectively combating bad odors.
Q: What ingredients do I need to make a thick paste for cleaning?
A: For a thick paste, you could use a combination of baking soda and water. This paste can be effective for cleaning surfaces that may have absorbed odors from the diapers.
Q: Is it safe to use synthetic fragrances in my homemade air freshener?
A: It’s best to avoid synthetic fragrances as they can contain harmful chemicals. Instead, opt for natural ways to create your air freshener using essential oils.
Q: How can I keep my trash can smelling fresh?
A: To keep your trash can smelling fresh, place baking soda at the bottom and use your homemade air freshener whenever you dispose of stinky odors. This will help to combat any lingering smells.
Q: Can I use muffin cup liners for a DIY air freshener?
A: Yes, you can use muffin cup liners filled with a mixture of baking soda and a few drops of essential oil as a simple air freshener. Place them around the room to help absorb odors.
Related posts:
 10 Surprising Health Benefits of Raisins
 How to Buy a Beard Balm – Beard Balm Buying Guide
 How to Buy a Dual Monitor Stand – A Buying Guide
 What to consider before buying a Nipple Cream
 How to Choose Rat Poison – A Buying Guide
 How to choose a good guinea pig water bottle – A Buying Guide
 How to choose a Furby Toy – A Buying Guide
 How to Choose a Body Scrub – A Buying Guide